How to apply your semi-permanent varnish with Awahena felt varnishes?
Do you want to have pretty, well-made and colored nails over the long term?Do you usually go to a salon to do your nails but want to trysemi-permanent manicureat home?
Or you don't have time to go to the salon and you want to have pretty nails at all times?
Discover semi-permanent varnish and the different steps toapply your semi-permanent varnisheasily and quickly.
The different steps to apply your semi-permanent varnish at home!
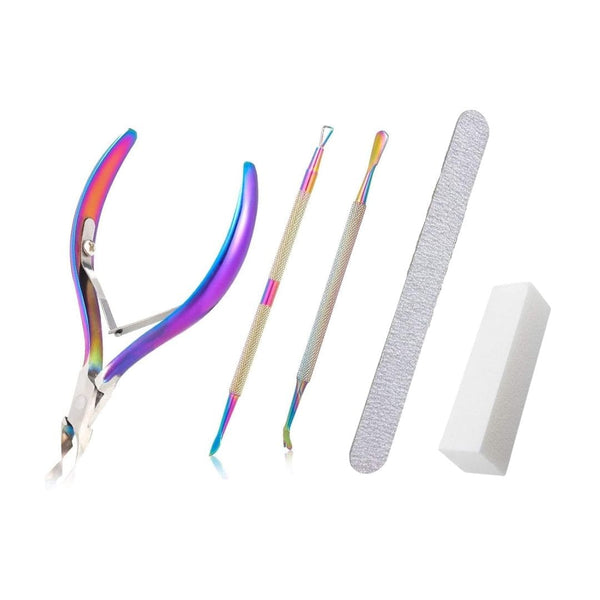
Step 1: cleaning and shaping the nail
Toapply semi-permanent varnishon the nail, the first step is to clean your nails well before removing any layers of varnish previously applied.
Then, push back the cuticles with a stick provided for this purpose.
File your nails properly, to reduce the risk of chipping on the nail edges. Give the desired shape to your nails according to their length, the varnish stays on all nail shapes.
A very important step and all too often neglected.Polishing your nails, or even filing them with a soft file,will provide a semi-permanent varnish that adheres completely and adheres much better to your nail.
To do this, sand the nail surface on a clean nail.Don't forget toclean the dust with 70° alcoholwith a cotton pad right after. YOUcanfor example also usea degreaserto remove the greasy layer.
Find out more...How to use a buffer for a pretty manicure?
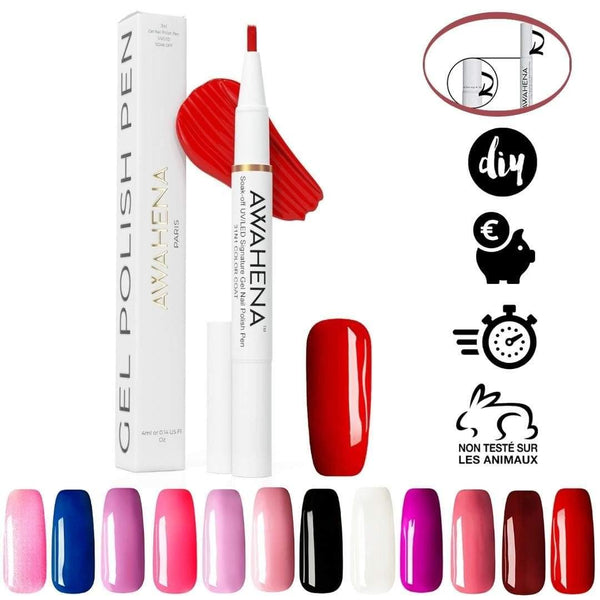
Step 3: Applying Color
Once the nails have been cleaned, polished and filed, let's now move on toapplying the colorof your semi-permanent varnish!
First apply a first coat of the color of your choice.Choose a thin first coatrather than a too thick coat which overloads the nail.
Tomanage the flow of theAwahena pen, turn the dial slightly to release the varnish little by little.
At the first use, between 4 to 6 turns (approximately 40 seconds) are necessary to prime the felt and allow the arrival of the varnish on the brush of the still white felt.
When applying, do not touch the skin around the nail with the varnish . If this is the case, wipe off the varnish trace with a cotton swab before catalyzing your liquid varnish.
Step 4: Dry and cure your polish with UV LED lamp (uv nail machine)
After applying the first layer of varnish, the next step toapply your semi-permanent varnishis to set, to harden, in other words to catalyze it using a UV LED lamp.
To do this, place your hand at the bottom of the LED lamp to catalyze (in other words dry or solidify) the semi-permanent varnish. Turn on your lamp, choose 60s timer. or 90s. andleave your hand there for the duration of the countdown.
If you find that the varnish layer is not dry enough, put your hand back under the lamp for 20 seconds. The drying stage is essential, the varnish must be perfectly dry with each coat applied.
Step 5: Apply a second coat of semi-permanent polish
This step is essential tointensify the colorof your semi-permanent varnish.
Apply a second coat, still managing the flow well using the felt-tip wheel, then place your main again under the LED lamp for 60 to 90 seconds.
If you want an even more intense color, repeat the color application and drying one last time.
Step 6: Maintain the Shine of Semi-Permanent Polish
If you find that your varnish is losing its shine after a few days or thata shine has occurred, you can at any time touch up one of your nails or even apply a new thin layer of varnish.
To do this, clean the surface of your varnish well with 70° alcohol , to remove all greasy deposits and obtain excellent adhesion.
Once this cleaning is done, come and apply the new layer or the tip of varnish for the touch-up, and catalyze it for 60 to 90 seconds.
The application time of your semi-permanent varnish with the preparation is estimated between 15 and 20 minutes fora pretty professional manicure,what more could you ask for?
Carry out all the steps of applying your semi-permanent varnish: our advice for a perfect and sublime application!
For asemi-permanent varnish applicationthat lasts over time and does not flake, it is imperative to follow all the application steps.
Here are some tips that will help you achieve your manicure:
Be aperfectionist and preciseduring application to have a clean and neat result.
Applythin layersto prevent bubbles from forming and thus best catalyze each pass under the LED lamp.
Apply3 coatsif necessary depending on the colors chosen or the expression you want to give to the color of your manicure.
Remove your semi-permanent varnish properly: the step not to be neglected!
If you want to change your manicure and thusremove your semi-permanent varnish,it is important to know all the steps so as not to damage your nails.
Step 1: Polish the nail surface
Polishing the surface of your nailshelps reduce the thickness of the semi-permanent polish.Be careful, you should never scrape your nails with a blade or file, you risk damaging them.
Step 2: perform the foil method with acetone
To remove all of the polish, it is important to use anacetone-based nail polish removerand soak your nails in acetone for between 5 and 10 minutes.
The most effective solution is to surround your nails with cotton soaked in acetone and held in place by a packet of aluminum foil. Leave on for 10 to 15 minutes until the varnish is well dissolved by the acetone.
Once the time has elapsed, remove the foils and with the cuticle pusher, or a scraping blade pushes back the varnish which should be removed in small pieces.
Afterremoving the semi-permanent nail polish,wash your hands well to remove all the acetone. Then apply a nourishing oil to all of your nails in order to regenerate and restore shine to the surface of your nail, which has just been under varnish for several days.
In summary
You will have understood, toapply your semi-permanent varnishperfectly at home or in front of your favorite series, with friends, it is important to follow several steps for apretty, professionaland sublime manicure.
It is also important to remove your nail polish tokeep your nails clean, nourished and pretty between each Awahena manicure.
All stages of varnish application
Step 1: cleaning and shaping the nail
To apply semi-permanent varnish on the nail, the first step is to clean your nails well before removing any layers of varnish previously applied.
Then, push back the cuticles with a stick provided for this purpose.
File your nails properly, to reduce the risk of chipping on the nail edges. Give the desired shape to your nails according to their length, the varnish stays on all nail shapes.
A very important step and all too often neglected. Polishing your nails, or even filing them with a soft file, will provide a semi-permanent varnish that adheres completely and adheres much better to your nail.
To do this, sand the nail surface on a clean nail. Don't forget to clean the dust with 70° alcohol with a cotton pad right after. For example, you can also use a degreaser to remove the greasy layer.
Find out more... How to use a buffer for a pretty manicure?
Step 3: Applying Color
Once the nails have been cleaned, polished and filed, let's now move on to applying the color of your semi-permanent varnish!
First apply a first coat of the color of your choice. Choose a thin first coat rather than a too thick coat which overloads the nail.
To manage the flow of the Awahena pen , turn the dial slightly to release the varnish little by little.
At the first use, between 4 to 6 turns (approximately 40 seconds) are necessary to prime the felt and allow the arrival of the varnish on the brush of the still white felt.
When applying, do not touch the skin around the nail with the varnish . If this is the case, wipe off the varnish trace with a cotton swab before catalyzing your liquid varnish.
Step 4: Dry and cure your polish with the UV LED lamp
After applying the first layer of varnish, the next step to apply your semi-permanent varnish is to set, to harden, in other words to catalyze it using a UV LED lamp.
To do this, place your hand at the bottom of the LED lamp to catalyze (in other words dry or solidify) the semi-permanent varnish. Turn on your lamp, choose 60s timer. or 90s. and leave your hand there for the countdown.
If you find that the varnish layer is not dry enough, put your hand back under the lamp for 20 seconds. The drying stage is essential, the varnish must be perfectly dry with each coat applied.